Return Order Management
Returning items to suppliers shouldn't be difficult. For this reason, Upstackers Technologies has developed a unique Return Order Management system for Odoo 18 that streamlines, intelligently, and dramatically speeds up the return process.
This blog post will explain how to produce vendor return orders across numerous purchase orders using our customized module, which includes integrated accounting, inventory adjustment, and a clear, easy-to-follow user interface
💡Why We Built This Return Order System

Return Product From Multiple POs
Enable users to return products from multiple purchase orders for a single vendor
Date Range Availability
Auto-fetch product lines based on vendor and date range.

Outward Receipts,Debit Notes & Backorder in One Place
Seamlessly create Outward Receipts, Debit Notes, and Backorders in one place.

Automate Validation & Traceability
Automate backend logic to ensure validation, traceability, and accurate accounting entries.
📝User Guide: Return Order
Let’s walk through how this works in action:
Step 1: Initiate the Return
Start from the main menu:
Purchases > Return Orders > Create
Then fill out the key fields:
Vendor
Choose the vendor for which you want to return items
Products
Multi-select products related to that vendor’s purchases.
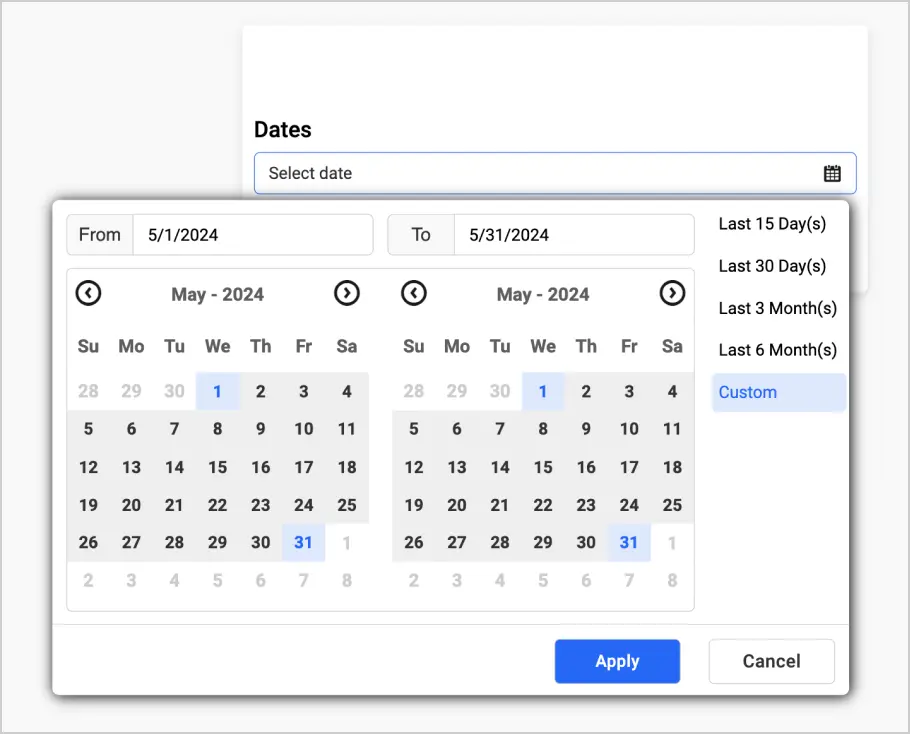
Date Range
Set the timeline to filter past purchase orders.
Purchase Order
Pick one or more POs — only those within your date range appea
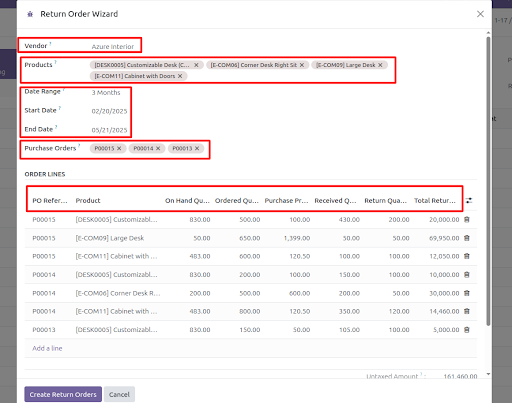
Once all fields are selected, the order lines are auto-fetched, saving time and manual entry.
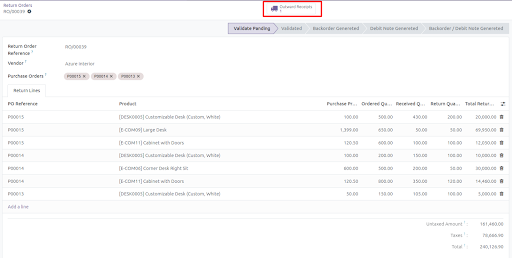
Step 2: Review the Order Lines
Each line is generated with full details:
PO Reference
The original purchase order number.
Ordered Quantity
What was originally ordered.
Return Quantity
The amount you wish to return.
Product Name
The item you’re returning.
Received Quantity
What was received from the vendor.
Return Value
Total refund/credit amount (auto-calculated).
On-Hand Quantity
What’s currently in stock.
Purchase Price
Unit price at time of purcha
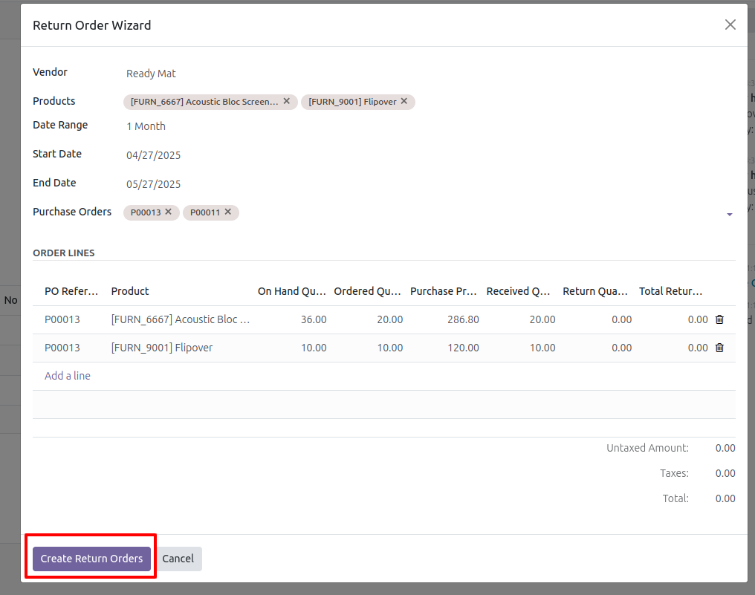
➡ Once satisfied, click “Create Return Order.”
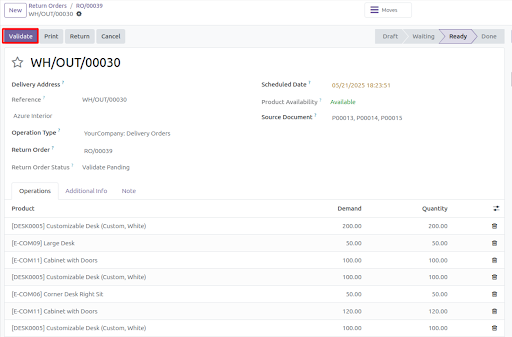
Step 3: Validate and Process the Return
After creation, you're redirected to the Return Order Form.
There, you can:
View or modify return values.
Apply tax rules automatically.
Click the "Outward Receipt" smart button to continue.
Click "Validate" on the Outward Receipt to confirm the return movement.
Step 4: What’s Next? Debit Note or Backorder?
After validation, two important options appear:
📄 Debit Note
Click “Debit Note” to:
Generate a draft Debit Note.
Link it automatically to the Return Order and Outward Receipt.
Make it available for accounting or refund tracking.
Once created, the button disappears to avoid duplicate notes.
🔁 Backorder
If the returned product is expected to be replaced:
Click “Back Order” to initiate a new purchase flow for the same item(s).
The system creates a draft PO linked to the original vendor and product.
Key Benefits of This Return Framework
Handle returns across multiple purchase orders for the same vendor in one go.
Automated product line filling, reducing user effort.
Generate all logistics and financial documents (Outward, Debit Note, Backorder) directly.
Improve accuracy and processing time for vendor returns.
Need Help Implementing Return Workflow
Whether you're handling bulk vendor returns or just want to save time and reduce manual work, this custom module is designed for you.
Let Upstackers Technologies help you modernize and optimize your Odoo experience.